Saturday, December 20, 2008

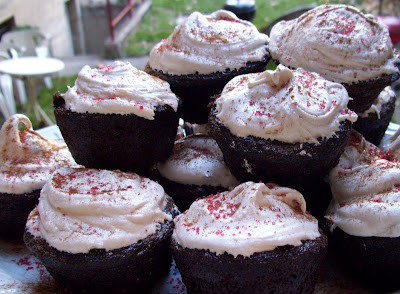
Chocolate Apple Cider Cupcakes with Marshmallow Frosting


Oh, I love my new camera. Now I can take semi decent photos of food!

As promised, here are the Chocolate Apple Cider Cupcakes. Guess what else? An easy Apple Cider Marshmallow Frosting recipe. The cupcake recipe is of course based on Martha Stewart's One-Bowl Chocolate Cupcakes recipe from her Baking Handbook. The frosting is an improvisational recipe made with what I already had on hand in the kitchen. Can't skip the frosting; after all, everyone knows the best part of a cupcake is the frosting. Want to know what the somewhat wacky secret ingredient is? When you make these, you might want to keep this part a secret since it doesn't sound too sophisticated: Spiced Apple Cider Instant Drink Mix. Yep, you read that right.

Chocolate Apple Cider Cupcakes
makes 2 dozen

2 1/2 cups flour
1 1/4 cup cocoa powder
3 packets (0.74 oz each) of Spiced Apple Cider instant drink mix
2 1/2 cups sugar
2 1/2 tsp. baking powder
1 1/4 tsp. baking soda
1 1/4 tsp. salt
2 eggs
1 egg yolk
1 1/4 cups milk
1/2 cup vegetable oil
1 1/4 tsp. pure vanilla extract
1 1/4 cups water

Heat oven to 350F. In a large bowl (use an electric mixer if you have one), sir together flour, cocoa powder, apple cider mix, sugar, baking soda, baking powder, and salt. Add the eggs and yolk, milk, oil, vanilla, and warm water. Beat until smooth and evenly combined, about three minutes.

Spray 2 standard muffin/cupcake pans with non stick cooking spray, or preferably line them with paper liners. Divide batter evenly among the paper liners filling each to about 2/3 full. Bake for about 20-25 minutes or until toothpick comes out clean when inserted. Let cool completely.


Apple Cider Marshmallow Frosting

2 egg whites
6 Tbsp. cold water
1/4 tsp salt
1 1/2 cup white sugar
1/2 tsp. cream of tarter
1 cup miniature marshmallows
2 packets (0.74 oz each) spiced apple cider instance drink mix

Combine all ingredients, except marshmallows and vanilla in a double broiler blending thoroughly over very rapidly boiling water. Beat vigorously with a hand held electric mixer until stiff peaks begin to form (about 7 minutes). Slowly beat in marshmallows until melted and add in vanilla. Frost cupcakes immediately. I sprinkled mine with cinnamon and red sugar.

Enjoy!
Wednesday, December 17, 2008

Maple Roasted Split Chicken with Sweet Potatoes


Looking for an easy, low-maintenance, yet comforting dish to get you through these hectic days of holiday preparation? This fits the bill. With just a few minutes of preparation, you can slide the chicken and sweet potatoes into the oven to roast while you finish decking the halls or wrapping gifts. Even the kids like it.

I used fresh oregano because that's what was in my refrigerator, but I think thyme or rosemary would work nicely here, too. No fresh herbs around? No problem - just sprinkle in the dried variety instead. Chicken pieces can also be used instead of a split chicken.

Maple Roasted Split Chicken with Sweet Potatoes

1 split chicken, 3-4 lbs., or equivalent in chicken pieces
3-4 medium sweet potatoes
2 yellow onions
2 Tbsp olive oil
1/4 cup maple syrup
several sprigs of fresh savory herb, such as oregano, thyme, or rosemary
salt and black pepper to taste

Preheat oven to 400F.

Peel and cut sweet potatoes into bite-size chunks, and cut onions into wedges. Mix olive oil and maple syrup together, then toss with the vegetables to coat, reserving a bit to drizzle over the chicken in the next step. Salt and pepper as desired.

Place chicken in large pan, and arrange vegetables around chicken. Drizzle reserved maple mixture over the chicken, and then scatter sprigs of herb over the top of chicken and vegetables. My pan was a little crowded in the picture below - I probably should have used a larger pan.


Roast in the hot oven for about 1 1/2 hours, or until the chicken is done, stirring once or twice during cooking time to evenly baste chicken and vegetables.

Friday, December 12, 2008

Busy Time of Year!

Hi There!

I know there hasn't been a post in a while, but I promise there will be soon! I have two posts up my sleeve which involve a nearly flour-less chocolate cake to die for, and some apple cider chocolate cupcakes. I just got a new camera and am working out the kinks of how it works, so hang in there- we will be back soon!

In the meantime, if you like weird art like I do, you might want to check out this series by photographer Nicole Pasulka, called "Drop Dead Gorgeous". I promise it's food/baking related, as you can see by the picture below called Death by Cake (which I can definitely relate to right now). Check out the pics and article here.


Monday, November 24, 2008

Almond Sugar Cookies

I had an urge to get all cutesy and decorate some sugar cookies. I got the candy corn originally so i could make the cookies look like these Pillsbury Thanksgiving Turkey Cookies but my cookies ended up being too small to fit the design, so I came up with this instead.

I got the cookie recipe from The Splendid Table, but substituted the vanilla extract for almond extract to add an alternative flavor. The chocolate frosting on top is Nutella, and as you can see for some cookies I used sliced almonds.

Sunday, November 23, 2008

What's on Your Thanksgiving Menu?

I am having a few friends over for Thanksgiving this year, so not only do I have to figure out how to make an entire Thanksgiving meal in my matchbox sized kitchen, I have to figure out what to make!

Here is what I am planning:

Breakfast (after all, you can't starve yourself all day waiting for the feast):
1) Bananas Foster Scones and Sweet Potato Hash Browns and coffee, obviously.

Main:
2) Kosher Turkey (thankfully my friend Sharon is in charge of this one)
3) Sourdough Stuffing with hazelnuts and sour cherries

Sides:
4) Roasted Garlic and Rosemary Mashed Potatoes
5) Caramelized Brussels Sprouts with Pistachios (normally I don't like Brussels sprouts, but they are great when made this way)
6) Mom's Homemade Rolls with jam and butter
7) Cranberry Sauce
*I'm still trying to decide if we need a salad or if I should substitute one of these sides for a yam or sweet potato dish

Dessert:
8) Apple Pie (My friend Jesse is preparing this one, apparently he has some secret recipe and wants to do a guest post on here about it)
9) Chocolate Pumpkin Pie

Beverages:
10) Hot Spiked Apple Cider

Now I just have to figure out a plan of attack, such as what can I make the day before, and in what order I need to make things the day of. I have never done a Thanksgiving dinner before, so if any of you have any advice or suggestions, send 'em my way!

Are you hosting Thanksgiving this year? Whats on your menu?

Me and Daniel at Julie's house for Thanksgiving last year

Tuesday, November 18, 2008

Cranberry Sauce: Look Ma, No Cans!

The players: an orange, a bag of cranberries, and a cup of sugar


Thanksgiving is - gasp! - just a few days away. Last year, Beth and Daniel visited us here in Austin, and we had a grand time. This year, it will be just Oscar and me and the girls, plus Oscar's mom, who arrives tomorrow.

If you're still planning to pull a can from the pantry when it's time to serve the cranberry sauce at your holiday table, please consider trying this fresh, no-cook cranberry sauce instead. It's so easy, so simple, so fresh, and so very delicious. Try it; I'll be very surprised if you decide to go back to the canned stuff after this. Also, keep in mind that this sauce has great versatility - it goes well with turkey, of course, but it is also an excellent companion with practically any meat or fowl.

This recipe comes from my trusty, tattered Joy of Cooking, which we received as a wedding present nearly nine years ago. The binding is barely holding on, but there are still many good things to make from it's pages. My Joy says you should make this at least two days before serving to allow the flavors to mellow, since the whole orange - rind and all - is used, but I've made it right before serving, and still thoroughly enjoyed it. Besides, I don't think a bowl of this stuff would last that long in my refrigerator. Oscar and I have been known to eat this by the spoonful, all by itself. Yes, it's that good.


Uncooked Cranberry-Orange Relish
from Joy of Cooking

Ingredients:
One 12-oz package of cranberries
1 orange, un-peeled
1 cup sugar

Pick over and rinse the cranberries, discarding any that are soft, spotted, or discolored. Cut the orange into pieces and remove seeds (if present). Place half of the cranberries and half of the orange in a food processor (see note below).


Pulse until mixture is evenly chopped, but not pureed. Transfer to a medium bowl; repeat with remaining cranberries and orange. Stir in the sugar. Cover and refrigerate until ready to serve.


We enjoyed our cranberry relish the other night with a pork loin roast.

My Joy says this will last up to two weeks in the refrigerator, but I find that information entirely inaccurate. We eat all of ours in just a day or two - it has never lasted two weeks in this house! I guess I'll have to make more next week.

Note: If you do not have a food processor, this can also be made in a blender. I did it last year. You'll have to stop and scrap down the sides a few times before getting a satisfactory texture, but it will work.

Saturday, November 15, 2008

Pomegranate Muffins

So, I wanted to make muffins but with a little twist. Pomegranates are in season right now, and they are really juicy and red. A little tip when picking out a pomegranate: The uglier, the better. For some reason the ugliest ones are the reddest and juiciest.

These got good reviews by some friends who happened to be over, and I thought they were pretty good too. Try them out if you are tired of the same old blueberry muffins!


Pomegranate Muffins
adapted from Martha Stewart's Baking Handbook
makes one dozen

Ingredients:
1 stick unsalted butter, melted
2 cups flour
1 1/2 teaspoons baking powder
1/2 teaspoon salt
1 or 1 1/2 cup pomegranate seeds and juice
1 cup sugar
2 large eggs
2 teaspoons pure vanilla extract
1/2 cup milk

Directions:
Preheat oven to 375F. Spray or grease your muffin tin, set aside. In a medium bowl whisk together flour, baking powder, salt and set aside.

In another medium bowl, beat melted butter and sugar vigorously until light and fluffy. Use an electric mixer if you have one. Add the eggs one at a time and beat until well combined, then mix in the vanilla.

Now add the flour mixture to the egg and butter mixture, gently mixing just until combined and then slowly add milk (don't over mix). Fold in the pomegranate seeds and juice.

Divide batter evenly between muffin tin cups, lined with paper cups if you prefer.

Bake for about 30 minutes or until muffins are a light golden brown. Let cool for about ten minutes.

Saturday, November 8, 2008

Toasted Coconut Pumpkin Pancakes

Tired of pumpkin yet? I hope not, because I can't get enough of it. Most of you have probably had pumpkin pancakes before, but have you had it with toasted coconut? It adds a great texture and a nice little crunch. The pancake recipe itself is low fat and fairly healthy, especially if you use nonfat milk or whole wheat flour instead of white.


Ingredients:

1 cup flour
2/3 cup toasted shredded coconut
1/4 cup packed brown sugar
1 1/2 tsp baking powder
1/4 tsp salt
1/2 tsp cinnamon
1/2 tsp ground ginger
1/4 tsp nutmeg
1 large egg
1 Tbs canola or vegetable oil
1 cup milk
1/3 cup pumpkin puree


Directions:

Evenly spread shredded coconut on a cookie sheet. Place in oven and set to broil. Broil for about 10-15 minutes or until coconut is evenly toasted and a medium golden brown. You will need to keep a close eye on it and stir often to ensure even toasting and to make sure it doesn't burn. Set aside and let cool.

In a medium bowl whisk together flour, coconut, baking powder, salt, cinnamon, ginger, and nutmeg. In a small bowl, beat together egg, oil, milk, and pumpkin. Add the pumpkin mixture into the flour mixture and stir just until combined. Let sit for five minutes.

Meanwhile, get your pancake griddle or skillet hot over medium-low heat, sprayed with cooking spray. Pour 1/4 cup batter onto middle of skillet. Turn over when it batter is bubbly and edges appear to be cooked (2-3 minutes). Cook for about 1 1/2 minutes on the other side, and serve immediately.

Try spreading cream cheese and pumpkin butter over the top, or just use butter and syrup. Yummmm!!!!!

Wednesday, November 5, 2008

Pumpkin Bread

Pumpkin bread to me is just one of those breads that warms the soul. This recipe is adapted from Martha Stewart's Baking Handbook. Make this bread and your neighbors will smell it and break down your door. No need to buy baked goods from Starbucks when you have a recipe like this up your sleeve!


Pumpkin Bread

Ingredients:
3 cups flour
2 tsp baking powder
2 tsp baking soda
2 1/2 tsp ground cinnamon
1/2 tsp ground nutmeg
1/4 tsp ground allspice
1/4 tsp salt
2 cups pumpkin puree (fresh or canned)
1 cup sugar
1 cup packed dark brown sugar
4 eggs
1/4 cup vegetable oil
1 2/3 buttermilk

Directions:
Heat oven to 350F and grease two loaf pans with non stick spray or butter. In a medium bowl whisk flour, baking powder, baking soda, salt and all of the spices.

In a large bowl, mix together pumpkin puree and sugars. Martha suggests using an electric mixer on medium for 2 to 3 minutes, but I just mixed it by hand until well combined. Add the eggs and oil and mix until combined. Add half the flour and mix just until barely combined. Add the buttermilk, then add the flour and mix just until combined.

Divide the batter between the two loaf pans and smooth the tops with a spatula. Place loaf pans on a cookie sheet and bake for 55-60 minutes, rotating the pans 180 degrees half way through. When knife inserted in the middle comes out clean, bread is done. Cool on wire rack for 10 minutes.

Of course it can be enjoyed right away, but the next day the flavors will have combined more completely.

Tuesday, November 4, 2008

Caramelized Onions


Red and yellow onions were taking over my kitchen counter last week, and something had to be done.

So I caramelized a big batch of them, and now I have lots of carmelized onion delicious-ness. Think about the possibilities here. Pizza. Pasta. Soup. Risotto. Quesadillas. Omelets. With goat cheese and herbs, baked into a savory tart!

The first necessary step was peeling and slicing all those onions into rings. Then pouring a few glugs of olive oil and piling those onion rings into a pan.


I don't know if you can tell, but that is a big pan of onions. It's a 12" wide deep-fry pan, so it has deep sides. Note the pot of white beans bubbling away on the back of the stove.

Now all that's necessary is long, slow, and gentle cooking over a low flame. No lid! We want the onions to caramelize, not steam. Poke at them and turn them around every so often with a wooden spoon or tongs, but find something else to do, too. These onions will take their sweet time, here.

The onions are done once they have turned a delicious caramel-ly brown color and are so sweet that they practically melt in your mouth. This might take 45 minutes to an hour, or more.

Remember the white beans on the back of the stove? They were delicious topped with the caramelized onions, along with oven-roasted tomatoes and fresh rosemary.


I wonder if onions can be caramelized in the slow cooker? The idea inspires the lazy cook inside me.

Sunday, November 2, 2008

No-Knead Sourdough Bread (1st attempt)

As promised, here is the sourdough bread I made. This is my very first attempt at homemade sourdough bread, it wasn't perfect but turned out pretty well! Give it a try and let me know if you can come up with some improved techniques.

Many of you have probably heard about the New York Times article on No Knead Bread, adapted from a recipe by Jim Lahey. The basic idea is that you let time do the work for you rather than the traditional method of kneading and rising. I thought this would be a great recipe to try out with my sourdough starter, and an added bonus is that I would not have to use any additional yeast since its already in the starter.

I used an adapted recipe from Sourdoughs International. The bread turned out to have a great sourdough flavor, but it wasn't light and fluffy enough for me. I think some of the problem may have been the temperature in which it was rising (may have been too warm) which inhibits the wild yeast and makes it leven poorly. The other complaint I have is that the dough was really wet, sticky and difficult to work with. Don't get me wrong, the bread will definitely be completely gobbled up within a couple days- I just think the recipe and my technique could use some improvement.


No-Knead Sourdough Bread
makes one loaf

Ingredients:
1 cup sourdough starter
3 cups flour (I used white, but I am sure whole wheat would be really good)
1 cup water
1 1/2 tsp salt

Directions:
Measure out your sourdough starter the night before, or a few hours before you start so as to make the starter fully active.

In a large bowl lightly combine all ingredients (do not use a metal bowl). Cover the bowl with plastic wrap and set in a safe place which is preferably between 70-75F for 12-18 hours.

After this proofing period, the dough will be very sticky. Sprinkle a work surface with flour and transfer dough to the surface, and sprinkle dough with additional flour. Let rest for about 15 minutes.

While handling as little as possible and using additional flour (no more than 1/4 cup) form dough into a rough ball and then place directly into your greased baking container (I used a loaf pan). Cover with a cotton towel and set aside at room temperature for about 4 hours or until it doubles in size.

Place in an unheated oven and then turn the oven on to 450F. The recipe I used calls for it to be baked for 1 hour and 10 minutes, which I found to be too long. Maybe you could try baking it for 45 minutes and then checking it. It will be done with the crust is a light golden brown.

Saturday, November 1, 2008

How's the Pumpkin Butter, You Ask?

Positively scrumptious! Velvety-smooth, sweet, spicy, and so full of pumpkin-ey goodness it will warm you up inside. We enjoyed it this morning with freshly baked scones and scrambled eggs.


I ended up letting it bubble away in the Crockpot on low for about eight or nine hours. Long enough for it to get so thick and rich that it sticks to the spoon when turned upside-down.


For the recipe and related post, click here.

Basil Chicken in Lettuce Cups


I harvested the last of my basil the other day and immediately put all of it to good use in this flavorful Thai-inspired basil chicken. Oscar says it is even more awesome as leftovers for lunch the next day.


Ingredients:

4-5 cloves garlic, minced fine
1/2 cup or so of finely minced red peppers, sweet and/or hot (I used a combination)
zest of one lemon and/or lime
2-3 Tbsp vegetable oil
2 pieces boneless, skinless chicken breast, minced fine or ground
1 Tbsp sugar
1-2 Tbsp fish sauce
2-3 Tbsp soy sauce
fresh whole basil leaves, at least 2-3 generous handfuls (the amount of my harvest, shown above, was not quite enough basil for me)
juice of one lemon or lime
Bibb lettuce leaves

Heat oil over medium-high heat. Add garlic, peppers, and zest; stir-fry for one minute. Add chicken and cook thoroughly, mixing and breaking up with a spoon as necessary. When chicken has fully cooked and browned, mix in sugar, fish sauce, and soy sauce. Then add basil leaves.


Cook and stir until basil leaves have wilted, and then squeeze the lemon or lime juice over the basil chicken mixture. Scoop mixture into lettuce leaves and serve.

Friday, October 31, 2008

The Donnie Darko

Happy Halloween!

Here is a tasty little Halloween themed beverage I concocted in the spirit of one of my most favorite Halloween themed movies, Donnie Darko. I'm not sure it has much to do with the actual movie, but it's quite a decadent alcoholic beverage you could have any time of year. If you like chocolate and dulce de leche, then this one is for you.


The Donnie Darko
serves 1

1 oz. vodka
1 oz. dulche de leche liqueur
1 oz. half and half
chocolate syrup
chocolate caramel candy for garnish (optional)

In a margarita or martini glass, drizzle chocolate syrup around the inside of the glass. Place ice cubes inside a martini mixer and pour in vodka, liqueur, and half and half. Shake about 5-6 times. Drain liquid into glass and place optional garnish on the rim.

Pumpkin: Seeds, Puree, and Butter!

Happy Halloween, everyone! We are sure to see lots of jack o'lanterns on display tonight, and today we're going to talk about fresh pumpkin puree, roasted and crunchy pumpkin seeds, and sweet, spicy, and velvety-smooth pumpkin butter.

As you get ready to carve your best pumpkin face tonight, don't forget there's lots of good eating to enjoy there. Of course, the carving pumpkin variety is not really the smoothest or sweetest squash out there. If you are buying pumpkin purely for the sake of eating, consider using a smaller variety, like the sugar pumpkin or kabocha. But if you are carving jack 0'lanterns tonight, remember to save the good parts, because that is perfectly edible pumpkin and can be used in a myriad of ways!

We clean the pumpkin before starting so that no dirt transfers to the inside of the pumpkin when we cut into it.

First, the seeds. Everyone knows the seeds are delicious when simply roasted and salted. Or we can get crazy with our spices and concoct our signature flavor roasted pumpkin seeds. I'm imagining cinnamon. Or garlic and lemon-pepper. Or maybe something spicy, like chili and lime, or curry powder. Mmmmmm. How about roasted in soy or tamari sauce? That sounds good, too. I can't decide!

  • Roasted Pumpkin Seeds: To prepare the seeds, you must remove them from the pumpkin and then rinse in water to remove all the stringy bits. Next dry them out on a towel. Toss them in a bowl with your seasonings of choice. Roast in a single layer on a lightly oiled cookie sheet at 250F degrees for about an hour, stirring every 10-15 minutes or so.

These are great. Pumpkin seeds are a good source of zinc. Snack on them alone, or add them to salads, muffins, breads, or anywhere else we would use nuts.


Now for the pumpkin "meat." We don't want all the stringy stuff, of course. Throw that out with the compost. We want the chunky flesh. When you cut out the face parts or other shapes from your jack 0'lantern, toss them in a baking dish. We're going to bake the pumpkin pieces in the oven until they get nice and soft. You can remove the skin with a paring knife now, or later, after the pumpkin is cooked. Do you carve out the inner wall of the pumpkin to reduce thickness before carving your design? Toss that in the baking dish, too! Just remember, none of the slimy, stringy, messy guts.

  • To make pumpkin puree: Place pumpkin chunks in a baking dish and cover tightly with foil. Bake at 350F degrees for about an hour, or until pieces can be poked easily with a fork. When pumpkin has cooled, remove any skin if necessary. Puree in a food processor until smooth, or mash and press through a sieve.
Now we have pumpkin puree! This can be used just like the canned pumpkin available at the grocery store. There are lots of pumpkin recipes out there, y'all. You can make pie, cake, muffins, bread, pancakes, soup, souffle... what else?

What am I making with my pumpkin puree? I'm making pumpkin butter! It's bubbling away in my little Crockpot right now, in fact. Want to try some? Here's the recipe - let me know what you think!

  • Pumpkin Butter: Combine two cups of pumpkin puree, 3/4 cup brown sugar, 1 teaspoon cinnamon, 1/4 teaspoon ground ginger, 1/4 teaspoon nutmeg, and 1/8 teaspoon ground cloves. Cook in a small-size slow cooker on the low setting for 6-12 hours. We want the pumpkin butter to stay on a spoon when the spoon is turned upside down. If you don't have a small slow cooker, you can also cook this on the stove in a saucepan, stirring frequently, over medium-low heat for an hour or two.

With such a small recipe, I won't bother with any canning. I plan to keep a bit in the refrigerator to use now, and perhaps freeze the rest for another time. It should keep fresh in the 'fridge for two to three weeks, and in the freezer for at least six months up to a year.

Have a great Halloween! Don't eat too much candy; it's not good for you in so many ways.

I'll be back later with more food to share - there's been a lot of cooking going on around here, and I have some yummy things to show you, like Thai basil chicken, roasted tomatoes and carmelized onions, and chorizo & potato stuffed peppers. And I've baked a pretty birthday cake and some tea party cupcakes, too!

Thursday, October 30, 2008

Meet Mr. Bubbles, the Sourdough Starter

http://www.wikihow.com/images/1/19/Squared-Circle--Sourdough-starter-7045.jpg
Mr. Bubbles

Making a sourdough starter is so amazingly easy, it's pretty much idiot proof. You just have to make sure to "feed" it once a day for the first few days. After that, you mostly just need to tend to it once a week. It's kind of like a pet that you keep in the fridge. I already have one sitting in my fridge, I named him Mr. Bubbles (feel free to make fun of me).

In a couple of days I will post a sourdough bread recipe that I am currently working on. Before that, I thought it might be useful for some of you to learn a little about the process.

Here is what you do:

Mix together one cup of flour with one cup of warm water. Pour into a wide mouthed jar or other container. Avoid using a metal container, because it can affect the starter in an adverse way. Make sure there is a way for air to circulate in the container. I used a mason jar and punctured a hole in the lid with a nail. Put aside and keep at room temperature.

After about 24 hours, you will need to "feed" the starter: throw out half the starter, and mix in half a cup of warm water and a half cup of flour. Set aside for another 24 hours and repeat. After 3-5 days, your starter should be bubbly and yeasty smelling which means its ready to use; at this point you can begin keeping it in your refrigerator.

Your starter will keep for as long as you continue to feed it once a week or so, and also after every time you make something with it in order to replenish it.

If you want more details on how to make a sourdough starter, John Ross over at Sourdough Baking has lots of additional information and advice.

Saturday, October 25, 2008

Lemon Olive Oil Cake with Chocolate Chips

I have been wanting to make this cake for a while now, it just sounds so interesting. Olive oil in a cake? One time when I was in high school a friend of mine and I wanted to make chocolate chip cookies but we didn't have any regular vegetable or canola oil. We did have olive oil however, so we used that instead. Needless to say the cookies turned out....interesting. I tried one bite and couldn't bring myself to eat anymore (ick!). For some reason, olive oil works very well in this cake and is the star ingredient along with the lemon. The recipe is adapted from Gourmet magazine. It is a very rustic, light, and airy cake; just barely sweet enough to be considered dessert.


Lemon Olive Oil Cake with Chocolate Chips
serves 8

Ingredients:
3/4 cup extra virgin olive oil
1 1/2 tsp lemon zest
1 1/2 Tbs fresh lemon juice
1 cup flour (use cake flour if you have it)
5 egg yolks
4 egg whites
3/4 cup sugar, plus 1 1/2 Tbs sugar
1/2 tsp salt
1/3 cup mini semi sweet chocolate chips (optional)

Directions:
Preheat oven to 350F, making sure the rack is in the middle position of the oven. Grease a 9 inch spring form pan, or a 9 cake inch cake pan.

Whisk together lemon zest, salt and flour. Set aside.

Beat together egg yolks and 1/2 cup of the sugar in a large bowl until thick and pale, about three minutes. Drizzle in olive oil and lemon juice while slowly stirring just until combined, the mixture will appear to be slightly separated. Using a wooden spoon, stir in flour mixture just until combined (do not beat).

Beat egg whites in a large bowl until foamy. Add 1/4 cup sugar, a little at a time, and beat until mixture just begins to hold soft peaks.

Gently fold in one third of whites into yolk mixture. Then fold in rest of egg whites and chocolate chips very gently.

Pour batter into greased pan and gently rap against the counter a few times to release any air bubbles. Sprinkle top with remaining sugar. Bake 45 minutes or until puffed and golden and a knife or toothpick inserted in center comes out clean. Cool cake in pan for about 10 minutes, then remove. Cool cake to room temperature. At this point you can top the cake however you like- powdered sugar, berries, lemon curd, frosting, or leave it plain. I chose to spread some lemon curd I had from Trader Joe's and then sprinkled powdered sugar on top.

Enjoy with tea, as breakfast, snack, or dessert!

Thursday, October 23, 2008

Carmel Sea Salt Brownies

One of my co-workers had his last day of work this week and is at this moment driving himself and all his belongings from D.C. to Aspen, Colorado. I thought he might need some brownies to accompany him on a long drive.

Now, these are definitely NOT my mother's brownies. I thought it was a possibility these might give her a run for her money, but nope. This recipe is supposedly adapted from a brownie recipe made at Mari's New York. I have never had one of her brownies, but have read they are to die for. I am not sure the brownies I made reached that status, but they are pretty good.


Caramel Sea Salt Brownies

2 sticks unsalted butter
8 oz unsweetened chocolate
4 large eggs
2 cup sugar
2 teaspoon vanilla extract
1 1/2 cup flour
1 teaspoon salt
1 cup caramel warmed (I used a jar of Smucker's Caramel Sauce
1/2 teaspoon sea salt

Preheat oven to 350Âş. Grease an 11 x 9 casserole pan. Line with parchment; grease again.

In a small bowl sift flour and add the salt, mix together

Over double boiler, melt butter. Once melted, add chocolate and stir until melted. Remove from heat and set aside.

Whisk eggs, sugar and vanilla together until fluffy and light in color. Add the chocolate and mix until combined. Gently fold in the flour.

Pour half the batter into pan and spread evenly. Pour half the caramel sauce over batter and spread evenly. Pour the remaining batter over caramel and spread evenly. Drizzle remaining caramel sauce over top, in one continuous back and forth pattern. With toothpick or knife, drag tip through top caramel and batter layer making same back and forth pattern but going the other way. Bake for 20 minutes, turn pan and bake for 15 minutes more.

Remove from oven and sprinkle sea salt on top. When cool, cut into squares or bars. Enjoy!

Sunday, October 19, 2008

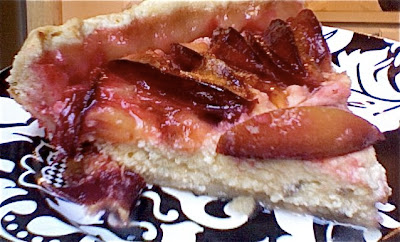
Ricotta Plum Pie with Lavender and Honey

Sunday is farmer's market day in my neighborhood. The weather in D.C. has been unbelievably sunny, crisp, and gorgeous lately; and the vendors at the market are selling the last of their summer harvest. I took advantage of the last of this season's plums and also bought some amazing fresh whole milk ricotta cheese from Keswick Creamery.

I made up this recipe on the fly as an experiment. I wasn't sure if lavender and plums go together, nor have I ever made anything with lavender before. The result is an unusual combination that works well together.
Fresh figs could easily be substituted for the plums.

In the end, next time I will make this pie just as is but without the lavender. If you are feeling adventurous though, I would definitely give the lavender a try!


P.S. One of these days I will post a detailed tutorial on how to make this pie crust. It's an amazing pie crust and is pretty easy to handle; another one of those reliable recipes that has been passed on in our family.


Ricotta Plum Pie with Lavender and Honey

Serves 8

Ingredients:

Filling:
1 1/2 cup whole milk ricotta cheese
1 tsp. dried lavender
2 egg yolks
3 Tbs. honey
1 tsp. vanilla extract

Fruit and Topping:
6 or 7 plums, sliced (8 slices per plum)
2 Tbs. white sugar
2 or 3 Tbs. fresh lemon juice
2 or 3 Tbs. honey

Crust:
1 cup flour
1/4 cup vegetable oil
1/2 tsp salt
3 Tbs. cold water


Directions:

With a fork, mix together flour, oil and salt until a crumbly mixture forms. Sprinkle cold water over mixture. Combine the water and flour/oil mixture just until barely incorporated. After the point where you add the water, mix as little as possible. The less you mix, the more flaky the crust will be. Form into a ball, you should be able to see white ribbons in the dough where the oil and water are immiscible (I just learned this word). Set aside.

Heat oven to 400F. To make the filling, place ricotta, egg yolk, honey and vanilla extract in a medium bowl and whisk until evenly combined. Add dried lavender and whisk again until well combined.

Now form the crust. To do this place plastic wrap flat down on a damp counter. Place the ball of pie dough in the middle and flatten a little. Place anther piece of plastic wrap over dough. With a rolling pin, roll out dough into a circle slightly larger than the pie pan. Place dough into pie pan; roll edges and pinch with fingers to make a ruffled edge. Spoon ricotta mixture onto the pie shell and even out with the back of a spoon or spatula.

Gently mix together sliced plums and white sugar, let sit for 5 or 10 minutes. Neatly arrange the plums on top of the filling in a circular pattern, or however you see fit. Drizzle honey and lemon juice over plums.

Bake for 40-50 minutes or until the crust is a light golden color. Let cool completely before serving. Goes well with a cup of tea or coffee!


UPDATE: Julie had a brilliant suggestion for next time: simmering the lavender in the honey and then straining it out so that there would be the lavender essence but not the lavender bits in the filling.

Saturday, October 18, 2008

Coconut Chicken Curry with Sweet Potatoes and Lentils

This curry was so good that we (four adults) ate it all before I had a chance to take any pictures. Now I have a wonderful excuse to make it again real soon, just so I can add a picture to this post.

Ingredients:
1 Tbsp olive oil
2-3 Tbsp mild Indian curry paste
2 pieces of boneless, skinless chicken breast, diced into bite-sized chunks
2 medium size sweet potatoes, peeled and diced into bite-size chunks
1/4 cup lentils (I used the split red lentils)
1 14 oz. can of coconut milk
1 1/2 cups chicken broth
other vegetables of choice, diced into small pieces, if necessary (I threw in about a half a cup green peas, straight from the freezer, because that's what I had)

Heat the oil in a large skillet over medium-high heat. Add the curry paste and stir-fry for about a minute. Then add the chicken, sweet potatoes and lentils; stir until well-coated in spices and oil.

Add the coconut milk and chicken broth. Bring to a simmer and cook about 20 minutes, or until the chicken and potatoes are cooked through, and the lentils have thickened the sauce. Add additional veggies and simmer for another 5-10 minutes, until vegetable pieces are tender.

Serve over hot, cooked basmati rice, or with naan bread for scooping. Delicious!

Looking for more sweet potato ideas? Check out this hash recipe I posted last week - the next time I make it, I think I'll try it with eggs at breakfast time and use chicken sausage instead. Yum!

Friday, October 17, 2008

Local Box Goodness

It's Friday, and around here that means my Greenling Local Box has arrived. It's always an exciting moment at our house when the doorbell rings at the end of the week; the girls shriek with excitement, and we all immediately start rummaging through our box to see what we got this week.


Here's a quick list of what arrived this afternoon:

Zucchini
Red potatoes
Cherry tomatoes
Roma tomatoes
Bibb lettuce
Sweet potatoes
"Wizard" Green peppers (not sure what the "wizard" means - they look like regular ol' bell peppers)
Baby lettuce
Crimini mushrooms
Yellow and red onions
Meyer lemons
Key limes
Dill

Greenling also included a delicious-sounding recipe for White Beans with Roasted Tomatoes that I think I'll try later.

Tonight I'm using up more of those sweet potatoes in a coconut chicken curry we'll share with friends later this evening. We'll finish off the meal with some luscious lemon-lime bars I made this afternoon for dessert. The recipe was an adaptation of this one from the delightful site Cooking for Engineers.

Have a fantastic idea for any of the other items? Let me know - I might try it out!

Thursday, October 16, 2008

Apple Cinnamon Bread


You probably have everything needed to make this bread already in your kitchen. If you don't have buttermilk on hand, see my note below. This recipe produces a sweet and spicy bread that is slightly chewy (in a good way). While it was baking I went for a nice walk in Rock Creek Park to check out the beautiful autumn leaves, fall is so beautiful in D.C. It was nice to come home after walking in the crispy weather to a warm apartment filled with the smell of apples and cinnamon.


Apple Cinnamon Bread

Ingredients:
2 cups flour
1 cup brown sugar
2 tsp baking powder
1 1/2 tsp. baking soda
1 tsp. salt
3 tsp. ground cinnamon
1 cup buttermilk*
1/3 cup sour cream or plain yogurt
1/4 cup vegetable oil
1 apple, peeled and chopped into small pieces

Topping:
1/8 cup vegetable oil
1 tsp. cinnamon
1/2-2/3 cup brown sugar (enough to make mixture crumbly)

Directions:
Heat oven to 350F. Mix together buttermilk*, sour cream or yogurt, oil, brown sugar, and apple until well combined. Add flour, baking powder, baking soda, salt, and cinnamon and stir with a wooden spoon until wet and dry ingredients are completely incorporated.

Pour evenly into a greased loaf pan. Sprinkle the topping mixture evenly over the top of the batter and lightly swirl with a knife.

Bake for about an hour or until a knife comes out clean when inserted in the middle.

Enjoy!

*If you don't have any buttermilk on hand (I didn't), simply make your own. All you do is pour 1 Tbs. of apple or white vinegar, or lemon juice into a 1 cup liquid measuring cup and then fill the rest of it with milk. Let sit for about 5 minutes or until it curdles, and now you have buttermilk. Also, this could easily be turned into a vegan bread by substituting the milk with soy or almond milk, and using soy yogurt instead of dairy yogurt.

Lemon Ginger Cake


A dear friend of mine had a birthday recently, and there is little I love more than making a cake for someone, especially a friend who has seen me through a lot of life's ups and downs. She doesn't have a huge sweet tooth, and is known for passing up the dessert tray at a restaurant and opting for buffalo wings instead. I am not sure how it's possible that we are still great friends given this disparity of respective weaknesses, but we are. Truth is stranger than fiction, folks. That said, she actually liked this cake (or so she said).
(BTW- we are only letting her pretend she is still 27, don't tell her we know)

The cake itself is not terribly sweet, but very good. The frosting is quite tangy and sweet, and I will probably keep it up my sleeve as a trusty go-to frosting.

Lemon Ginger Cake

3/4 cup unsalted butter, softened
1 1/4 cup white sugar
3 eggs
1 tsp. vanilla extract
1/2 cup plain yogurt
2 Tbs. lemon zest
1 Tbs. fresh ginger, grated
2 cups flour
1 tsp. baking powder
1/2 tsp baking soda
1/2 tsp salt

Heat oven to 350F. Cream the butter and sugar together until light and fluffy. Add eggs, vanilla, yogurt, lemon juice, lemon zest and ginger. Beat for one minute.

Add flour, baking powder, baking soda, and salt. Mix well.

Divide batter between two round cake pans, don't forget to grease or spray the pans with cooking spray first. There will be batter left over which is great for making cupcakes (see cupcake photo at the end of this post). Bake for 35-45 minutes, or until a knife comes out clean when inserted in the middle. Cool completely at room temperature.

Lemon Ginger Frosting:

2 tsp. lemon zest
4 Tbs. melted butter
3-4 cups powdered sugar
3 Tbs. lemon juice
2 Tbs fresh ginger, grated
1 tsp. salt

Whisk together lemon zest, butter, 3 cups powdered sugar, lemon juice, ginger and salt until the mixture starts to stiffen. Add more powdered sugar until the frosting seems thick enough to stick to the cake.

After the cake has cooled completely, top one of the cake rounds with frosting. Place other cake round on top, and then frost the rest of the cake. I decorated mine with candied ginger and fruit jellies from Trader Joe's.


Here is a picture of the cupcakes. I took these to work, and there wasn't a crumb left after 11 AM.

Julie's Best Mac & Cheese

The rain has arrived this week, and it had us stuck in the house all day yesterday. So it seemed like the perfect day for a warm bowl of one my kids' favorite comfort foods - macaroni and cheese.

Homemade macaroni and cheese is really not much more complicated than the stuff in the blue box. No, really, it isn't. And for some reason, my girls won't eat the boxed stuff, anyway. (Okay, the obvious reason is because this is much better.) So this is how we make it in our house.

In this dish, I forgo the traditional bechamel sauce, favoring instead a carbonara-esque sauce made with egg and milk. The result is an incredibly rich, creamy, cheesy sauce. Easy and yummy!


Ingredients:

1 cup small pasta (we like whole-wheat organic elbows)
1 egg
1/4 cup milk (although I never measure - just splash it into the bowl with the egg)
4 ounces sharp cheddar cheese, shredded
salt (and pepper) to taste

Boil the pasta as directed.

Meanwhile, beat the egg and milk together in a small bowl. When the pasta is done, drain off the hot water in a strainer and immediately put the empty pot back on the burner over low heat.

Pour the egg-milk mixture into the pot and stir while cooking over low heat for a few minutes. You want to heat the mixture so it gets hot and kills any bacteria and thickens just so slightly, but not scramble the eggs.

Stir in the hot, drained pasta (which will also help cook the egg sauce a bit), and then mix in the shredded cheese until melted and smooth. Add salt to taste (and pepper, if desired), and then EAT!

This makes enough to feed about two hungry kids.

Wednesday, October 15, 2008

Donuts!


"Donuts. Is there anything they can't do?" -Homer Simpson

When I first got the idea to make donuts from scratch, my eyes almost popped out of my head. I love anything even remotely kitchy.

I was warned they would take commitment. These aren't something you can just stir up in a bowl and stick on the skillet.... I think I underestimated that warning as I was up until one in the morning making these puppies.

They were pretty good, but I definitely learned a few things:

1. I need a candy thermometer.
2. I need a round pastry cutter set.
3. I'm 95% sure that its better to fry these at a lower temperature than the recipe calls for and to take them out of the oil well before you think they are done, otherwise they turn out dry and chewy instead of soft and melt in your mouth.
4. Only make as much as can be consumed or given away in one day,
5. These are a great gift to give to someone who needs a little happiness in their day.

I got the idea and the glazes from the amazing Joy the Baker. I did not use an electric mixer for the donuts, as I do not have one yet. I didn't find it to be a problem though, I just vigorously mixed the dough with my hands when the recipe called for it to be mixed for 3 minutes (kind of a bicep work out). Also, I think what was even better than the donuts themselves were the donut holes. I dropped them immediately from the oil into a bowl of cinnamon and sugar and rolled them around. I took the donuts and the holes to work, and the holes were first to go. Just as an FYI-
These are not super sweet like the kind you buy at a grocery store bakery or Krispy Kreme. They taste more like a slightly sweet fry bread with a touch of cinnamon.

Though these were very good, I think next time I will try out these from Peanut Butter and Julie.

P.S. I know the picture isn't of the highest quality, I had to take it with my cell phone. Don't worry, I am working on getting my broken camera fixed.


Gourmet, December 2006

makes 1 dozen doughnuts

1 (1/4-oz) package active dry yeast (2 1/2 teaspoons)
2 tablespoons warm water (105–115°F)
3 1/4 cups all-purpose flour plus additional for sprinkling and rolling out dough
1 cup whole milk at room temperature
1/2 stick (1/4 cup) unsalted butter, softened
3 large egg yolks
2 tablespoons sugar
1 1/2 teaspoons salt
1/2 teaspoon cinnamon
About 10 cups vegetable oil for deep frying

Stir together yeast and warm water in a small bowl until yeast is dissolved. Let stand until foamy, about 5 minutes. (If yeast doesn’t foam, discard and start over with new yeast.)

Mix together flour, milk, butter, yolks, sugar, salt, cinnamon, and yeast mixture in mixer at low speed until a soft dough forms. Increase speed to medium-high and beat 3 minutes more.

Scrape dough down side of bowl (all around) into center, then sprinkle lightly with flour (to keep a crust from forming). Cover bowl with a clean kitchen towel (not terry cloth) and let dough rise in a draft-free place at warm room temperature until doubled in bulk, 1 1/2 to 2 hours. (Alternatively, let dough rise in bowl in refrigerator 8 to 12 hours.)

Turn dough out onto a lightly floured surface and roll out with a lightly floured rolling pin into a 12-inch round (1/2 inch thick). Cut out as many rounds as possible with 3-inch cutter, then cut a hole in center of each round with 1-inch cutter and transfer doughnuts to a lightly floured large baking sheet. Cover doughnuts with a clean kitchen towel and let rise in a draft-free place at warm room temperature until slightly puffed, about 30 minutes (45 minutes if dough was cold when cutting out doughnuts). Do not reroll scraps.

Heat 2 1/2 inches oil in a deep 4-quart heavy pot until it registers 350°F on thermometer. Fry doughnuts, 2 at a time, turning occasionally with a wire or mesh skimmer or a slotted spoon, until puffed and golden brown, about 2 minutes per batch. Transfer to paper towels to drain. (Return oil to 350°F between batches.)

I also fried the doughnut holes for about 1 minute and them tossed them in powdered sugar and cinnamon sugar straight out of the hot grease.

Chocolate Glaze

recipe from Alton Brown

1/2 cup unsalted butter
1/4 cup whole milk, warmed
1 tablespoon light corn syrup
2 teaspoons vanilla extract
4 ounces bittersweet chocolate, chopped
2 cups confectioners’ sugar, sifted

Combine butter, milk, corn syrup, and vanilla in medium saucepan and heat over medium heat until butter is melted. Decrease the heat to low, add the chocolate, and whisk until melted. Turn off heat, add the powdered sugar, and whisk until smooth. Place the mixture over a bowl of warm water and dip the doughnuts immediately. Allow glaze to set for 30 minutes before serving.

Maple Glaze

Bon Appetit November 1995

You might consider doubling this recipe and drizzling it on everything you know and love.

1/4 cup (1/2 stick) unsalted butter
2 tablespoons pure maple syrup
2 tablespoons whipping cream
6 tablespoons powdered sugar, sifted

Melt butter with maple syrup and cream in heavy small saucepan. Remove from heat. Add powdered sugar and whisk until smooth. Cool glaze until slightly thickened, about 15 minutes. Dip doughnuts into glaze or drizzle glaze over doughnuts.

These glazes are really tasty, I ended up having left over glaze and used it as an ice cream topper.


Sweet Potato - Chicken Hash

My Greenling Local Box has been heavy on sweet potatoes for the last few weeks, and I've garnered quite a collection. I was getting tired of my usual standbys (in a vegetable curry or diced and roasted with olive oil as a side dish), so I decided to try something a little different: some hash patties. I topped the hash with a chipotle-garlic salsa, but I think these would be just as good with a finely diced chipotle pepper or two tossed into the hash mix before cooking. I was doubtful as the mixture came together, wondering if it would be a success, but in the end, these turned out very tasty, and I will certainly make these again. Served with cornbread and salad, these made a great weeknight meal.


Ingredients:

2-3 medium sweet potatoes, peeled and diced into 1/2" cubes
2 pieces of boneless, skinless chicken breast
about 2 Tbsp butter
about 2 Tbsp olive oil
1 small red onion
1/2 green bell pepper
2 cloves garlic
1 Tbsp fresh oregano, chopped
1 tsp paprika
salt and pepper to taste
Salsa, for garnish

Place the sweet potatoes in a medium saucepan, cover with water, and bring to a boil. Simmer for 15-20 minutes, or until potato pieces are soft and easily pierced with a fork. Drain and set aside.

Meanwhile, chop the chicken breast into very small dice. Or, if you're like me and don't really enjoy the trouble of chopping a lot of raw chicken, toss the chicken into the food processor and process until the chicken is broken up into small bits. (I suppose here you could even use chicken that has been pre-ground by your butcher.) Also finely dice the onion, bell pepper, and garlic. (Or, again, if you're like me and feeling lazy and/or pressed for time, toss these in the food processor, too. When it comes to feeding my kids, the-smaller-the-better when it comes to vegetable pieces, anyway.)

Heat about 1 tablespoon each of olive oil and butter in a skillet over medium-high heat. Add the chicken and vegetable mix, and stir and cook until cooked through and slightly browned. Stir in the oregano and paprika, and then add salt and pepper to taste. Combine the sweet potatoes and chicken mixture in a large bowl, mashing as necessary to bring the mixture together.

In a large skillet (preferably non-stick), heat another tablespoon or so each of butter and olive oil over medium heat. Scoop out 1/4 cup size or so mounds of the hash mixture and place them in the pan, pressing down a bit to make patties. Cook each patty until browned and crisp on one side, then carefully flip with a spatula and cook the other side. I had to cook mine in two batches.

Remove to a plate, top with salsa, and dig in.

Tuesday, October 14, 2008

Grammy's Ginger Cookies


Food For Thought: "The purpose of flavor is to arouse a special kind of emotion, that flavor must emerge from genuine feelings about the materials you are handling. What you are, you cook."
~ Marcella Hazan

What better way to start out than to bake a classic family recipe? This recipe was passed down from our father's mother, Clarice Marie; or as we so affectionately called her, Grammy. These cookies are great for getting you in the mood for fall, and they smell delicious. Even if you think you don't like Ginger Cookies or Ginger Snaps, you ought to give these a try. As Julie pointed out to me today, people who stubbornly claim they do not like ginger cookies will often fall head over heels for these.


Grammy's Ginger Cookies
makes about 4 1/2 dozen

Ingredients:
1 cup unsalted butter
1/2 cup vegetable or canola oil
1/2 cup molasses
2 eggs
2 cups sugar
4 cups flour
4 tsp. baking soda
1 tsp. ground cloves
1 tsp ground ginger
2 tsp. cinnamon
2 tsp. salt (if you are using salted butter, just use 1 tsp.)

Directions:
Melt butter and let cool for about 10 minutes. Add oil, sugar, molasses, eggs and beat until well combined. In a separate bowl, mix together flour, baking soda, cloves, ginger, cinnamon and salt. Combine the two mixtures and chill in the refrigerator for 1-2 hours or until the batter stiffens slightly.

Preheat oven to 375F. Form batter into balls about one inch in diameter, or the size of a donut hole. Roll each ball in a bowl of sugar to coat completely, and then place on cookie sheet. Bake for 8-10 minutes or until your preferred consistency is reached (you might want to experiment with this). When the cookies come out of the oven they will be puffy, but as they cool on the counter they will flatten. Enjoy with a cold glass of milk, yummy.

Monday, October 13, 2008

Spicy-Sweet Butternut Squash Soup

A butternut squash has been sitting on my kitchen counter for a few weeks now, eyeing me as I walk past everyday, silently challenging me to do something with it. I don't know, but winter squash feels like, well, winter, and it's been hard for me to wrap my mind around cooking with it when it's still 90+ degrees outside. But finally, as the weather begins to cool off here in central Texas (albeit only slightly), I found the inspiration I need. The temperature has fallen to the mid-80's, and we have rain in the forecast. Has fall finally arrived? Let's have some soup.


Ingredients:

1 medium-sized butternut squash
2 medium apples
1 medium onion, diced
1-2 Tbsp olive oil
1-2 chipotle peppers with adobe sauce, chopped
1/4 tsp ground cumin
4 cups vegetable or chicken stock
dollop or two of cream
salt to taste

While the oven is preheating to 350F, cut the squash open lengthwise and remove the seeds and strings. Quarter and core the apples. Place squash, cut side down, and apples on a lightly greased baking sheet. Roast for about 30 minutes, or until the squash can be pierced easily with the tip of a knife. When cool enough to handle, scoop out the flesh of the squash and discard the skin.

In a large soup pot, saute the onions in the olive oil until soft and golden. Add squash, apples, chipotle peppers, cumin, and stock. Simmer gently for 20-30 minutes. Working in batches, puree in blender or food processor to the consistency you like (Ultra smooth, or a little on the chunky side? You choose.). Transfer to a large bowl or soup tureen, salt to taste, and stir in the cream.

Ladle into serving bowls and garnish with extra cream. Serve with good bread and salad, and you have the perfect meal to usher in the cooler weather of fall.

Introducing Julie


I'm Julie, and I love Great Food and sharing it with others. I live in Austin, Texas with my husband, two daughters, a dog, a cat, and two hermit crabs. Getting busy in the kitchen and then savoring the results is one of my favorite pastimes. I think sharing Great Food and Good Times with friends and family is priceless.

Around here, you'll see me doing most of the cooking. I try to keep things simple yet satisfying, since I have a family to feed and it seems like we are always on the go. Freshness and quality are important to me, and local, seasonable ingredients are what inspire me. I do have a terrible sweet tooth, however, and it's not uncommon for me to whip up a batch of something to satisfy that craving. Like brownies. Mmmmm, brownies. Beth and I can both crank out a mean pan of brownies. We learned it from our mom. Thanks, Mom!

Beth came up with the great idea of sharing our virtual kitchen with you, and I enthusiastically jumped on board. There's so much we all can learn from each other, and I'm looking forward to the journey. And maybe someday, if your lucky, we just might share that secret family recipe for brownies...

Introducing Beth


Hi, I'm Beth and I like to bake. No, scratch that; I LOVE to bake. Like a piece of freshly baked bread that needs to be buttered, I've got to get my hands, my clothes, my hair, and my tiny D.C. apartment kitchen covered in flour. I am a messy baker; just ask my fiancé. What you can expect from me is that I will post mainly baking recipes. Sometimes I might throw in something else- a little chowder, a little pasta, a little enchilada. But mostly you will see cake, pies, bread, cookies, muffins, tarts, and brownies. Mmmmm, brownies.

I am not the world's most perfect baker, not by a long shot. I just like to do it because it calms me down and brings me back to earth after a hectic day. All a person really needs for a little pick-me up is good food; the comforts of bread, sugar and chocolate; getting messy; the satisfaction of accomplishing something; and what's life without a little glass of wine to accompany you while you are attempting to master your Grammy’s famous Red Devils Food Cake (which no one but her could ever seem to quite nail), right?

I will try and keep my recipes as budget friendly, fresh, simple, and seasonal as possible. So lets do this together, want to join us? My sister Julie and I are pretty darned good when we put our heads together, but I could still use your input and advice. Speaking of Julie, she is a master at making the perfect roux among many other things, an inspirational cook and baker if you ever saw one. Try out one of our recipes and tell us what you think!
 

blogger templates | Make Money Online